🎙 VoxVerse
Multi-instance voice platform for Star Citizen squadrons.
This guide covers the desktop app setup and browser-based connection.
Create a voice instance
Go to the creation page
From sctool.fr, click CREATE AN INSTANCE on the VoxVerse card, or go directly to:
Pick an instance ID
Enter a short name for your squadron (e.g. nightriders, phoenix). This ID will appear in the connection URL. Lowercase letters, numbers and hyphens only.
Choose a channel template
Pick a preset template (Combat, Mining, Exploration…) or Custom to define your own channels from scratch. You can edit them later from the admin panel.
Save the PIN and share the link
Once created, you receive a 4-digit PIN — write it down now, it is shown only once. It protects the instance admin panel.
🔗 Share https://voxverse.sctool.fr/index.html?id=YOUR-ID with your squadmates so they can join instantly from any browser.
Download and launch the Windows app
Download the app
On sctool.fr, click ⬇ APP WINDOWS v1.0.0 in the VoxVerse card, or use the direct link:
Run the .exe — no installation needed
VoxVerse is a portable application. Simply double-click VoxVerse-1.0.0.exe to launch it directly. No installer, no admin rights required.
Bypass the Windows SmartScreen warning
Windows SmartScreen shows this warning for any application that is not signed with a paid developer certificate. VoxVerse is an independent tool not published on the Microsoft Store, so the alert is expected and normal. The app is safe.
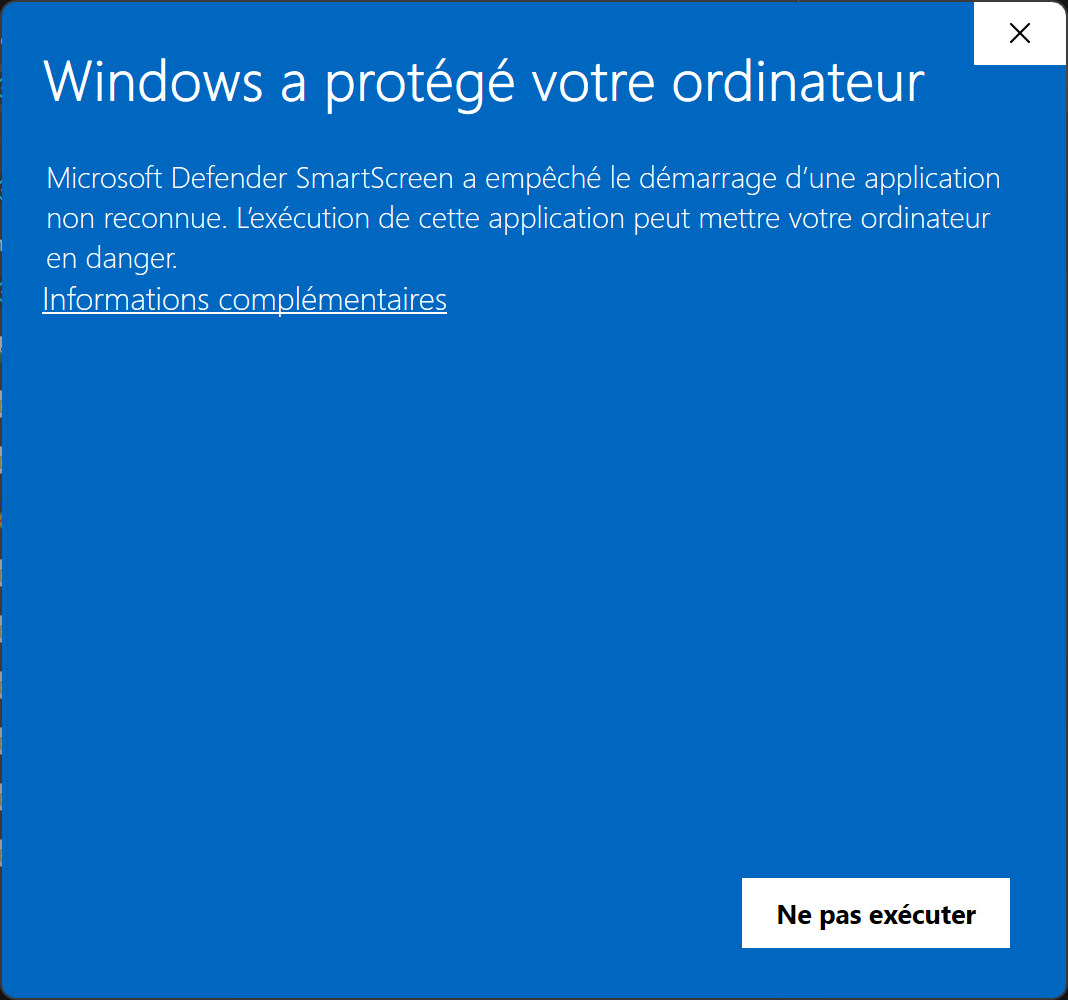
First window — click "More info"
On first launch, Windows shows this warning. Do not click "Don't run" — instead click the "More info" link in the lower part of the dialog.
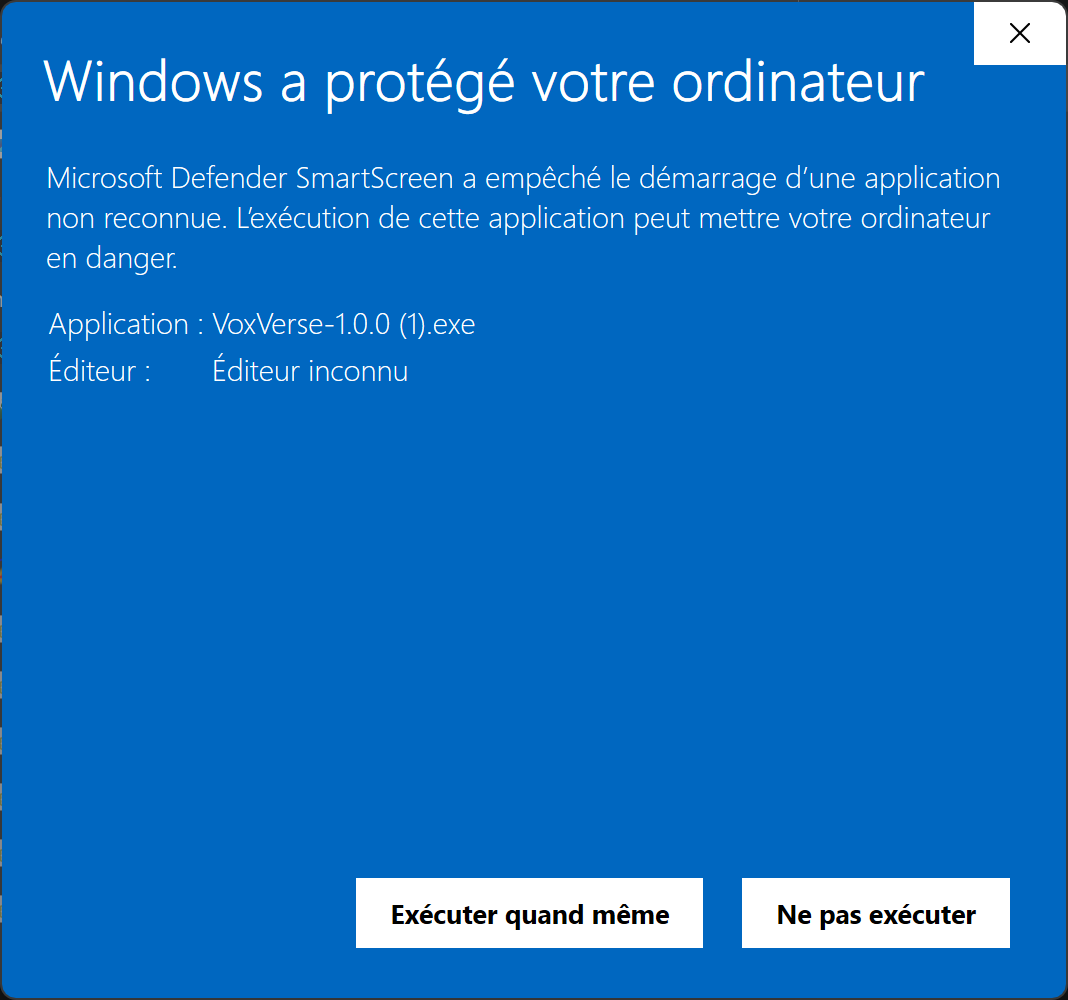
Second window — click "Run anyway"
After clicking "More info", the "Run anyway" button appears at the bottom. Click it to launch VoxVerse.
✅ This warning only appears on the first launch. On subsequent starts, VoxVerse opens directly without any prompt.
Connect to an instance
Enter the instance ID
On launch, the app asks for the instance ID to join. Type the ID shared by your squadron leader (e.g. nightriders). Browser users can also navigate directly to the instance URL.
Enter your callsign
Type the name your squadmates will see in the voice interface — your Star Citizen handle or callsign.
Pick a channel and go live
Once connected, select the voice channel you want. Hold your PTT key (Push-to-Talk) to transmit. The overlay stays on top of Star Citizen at all times.
💡 The overlay is draggable — click and drag the top bar to reposition it anywhere on your screen.
Switch instance
To join a different instance, click the ⇄ INSTANCE button at the top of the interface and enter a new ID.
Access the admin panel
Open the instance admin page
From the voice page, click the Admin link at the bottom, or navigate directly to:
Enter the 4-digit PIN
Type the PIN you received when creating the instance. If you lost it, it can only be reset by the global administrator.
Manage your channels
From the admin interface you can add, rename or delete voice channels, see who is connected, and reset the instance PIN.